NuFiStreamer Pipeline 실행해보기
시작하면서
YOLOv5s 모델을 사용하여 객체 탐지를 수행하는 NuFiStreamer 파이프라인을 구성해봅니다.
NuFiStreamer의 객체 탐지 (Object Detection) 파이프라인을 실행시켜봅니다.
Goal
- NuFiStreamer 파이프라인 구성하기
- NuFiStreamer 파이프라인 실행해보기
개요
이번 페이지에서는 YOLOv5s 모델을 사용하여 객체 탐지를 수행하는 NuFiStreamer 파이프라인을 구성해보고 결과를 확인해보겠습니다.
Config 파일 작성
먼저 NuFiStreamer를 실행시키기 위한 Config 파일을 작성해주겠습니다.
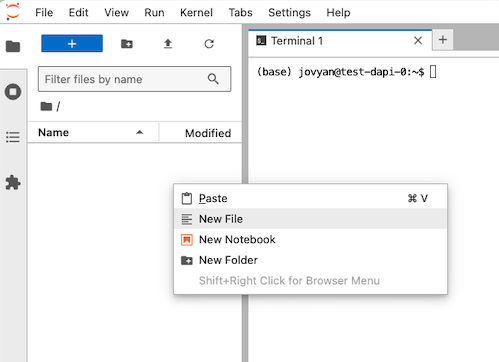
파일경로 사이드바에서 마우스 오른쪽 버튼 -> New File 버튼을 눌러 config.json 파일을 생성합니다.
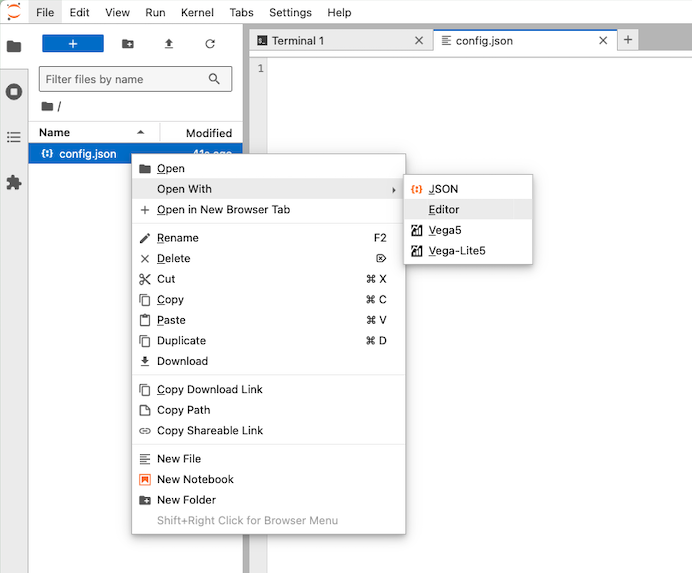
생성한 config.json 파일에 마우스 오른쪽 버튼 -> Open With -> Editor를 통해 파일을 열어줍니다.
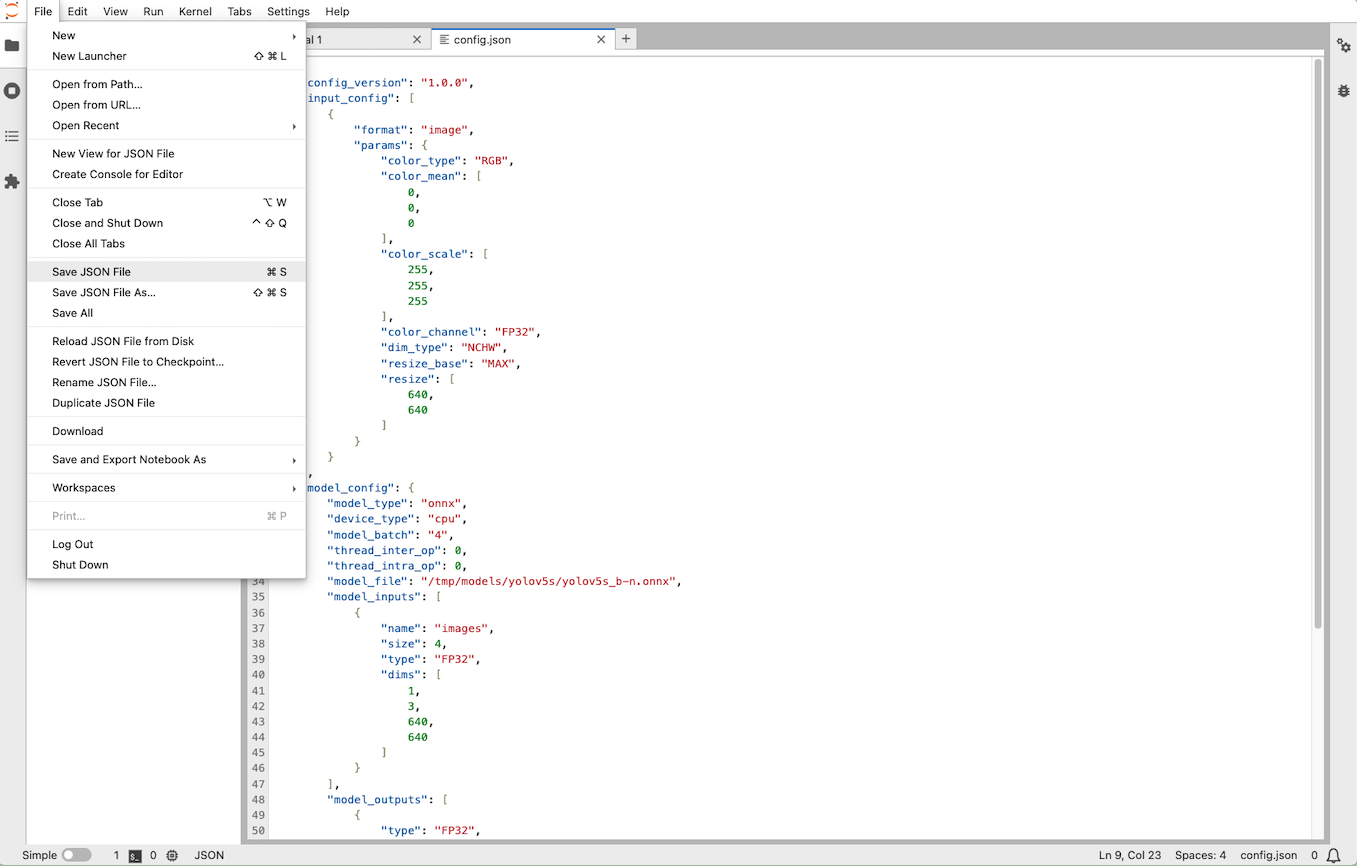
아래 JSON 파일 내용을 복사하여 파일에 작성하고 File 탭 -> Save JSON File로 저장합니다.
config.json
{
    "config_version": "1.0.0",
    "input_config": [
        {
            "format": "image",
            "params": {
                "color_type": "RGB",
                "color_mean": [
                    0,
                    0,
                    0
                ],
                "color_scale": [
                    255,
                    255,
                    255
                ],
                "color_channel": "FP32",
                "dim_type": "NCHW",
                "resize_base": "MAX",
                "resize": [
                    640,
                    640
                ]
            }
        }
    ],
    "model_config": {
        "model_type": "onnx",
        "device_type": "cpu",
        "model_batch": "4",
        "thread_inter_op": 0,
        "thread_intra_op": 0,
        "model_file": "/tmp/models/yolov5s/yolov5s_b-n.onnx",
        "model_inputs": [
            {
                "name": "images",
                "size": 4,
                "type": "FP32",
                "dims": [
                    1,
                    3,
                    640,
                    640
                ]
            }
        ],
        "model_outputs": [
            {
                "type": "FP32",
                "name": "output0",
                "size": 4,
                "dims": [
                    1,
                    25200,
                    85
                ]
            }
        ],
        "model_out_type": "raw"
    },
    "output_config": {
        "converter": "yolov5s_box",
        "labels": "/tmp/models/yolo-v3-tf/labels.txt",
        "threshold": 0.5,
        "icu_threshold": 0.7
    }
}
자세한 Config 파일 작성 방법은 Config 파일 작성법을 참고해주세요.
파이프라인 작성
이번에도 gst-launch-1.0을 사용하여 파이프라인을 구성해보겠습니다. 이번에는 webm 형식으로 파일을 저장해보겠습니다.
MODEL_CONFIG_PATH=./config.json gst-launch-1.0 \
    filesrc location=/tmp/videos/sample_720p.h264 \
    ! h264parse \
    ! avdec_h264 max-threads=16 \
    ! videoconvert n-threads=16 \
    ! queue \
    ! sdpreprocess \
        model-config=$MODEL_CONFIG_PATH \
        n-threads=16 \
    ! queue \
    ! sdinfer \
        model-config=$MODEL_CONFIG_PATH \
    ! sdpostprocess \
        model-config=$MODEL_CONFIG_PATH \
    ! sdosd \
    ! videoconvert n-threads=16 \
    ! vp8enc \
    ! webmmux \
    ! filesink location=./inferenced_video.webm
파이프라인을 실행합니다.
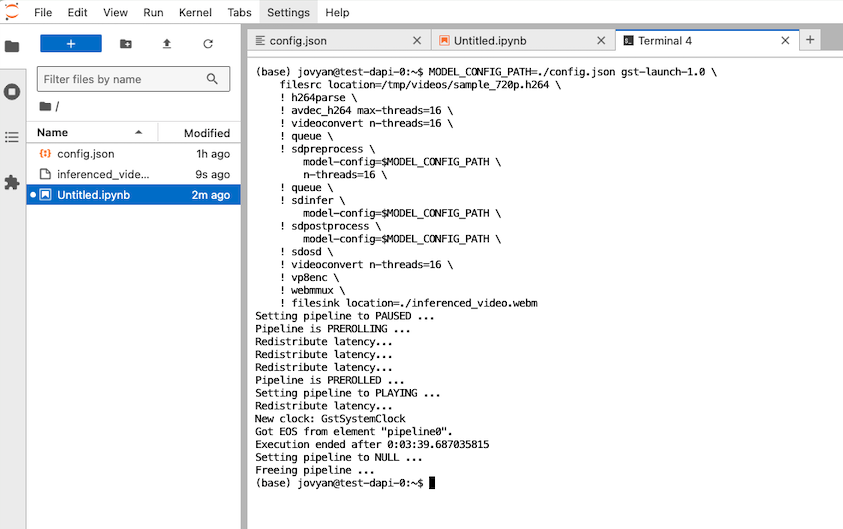
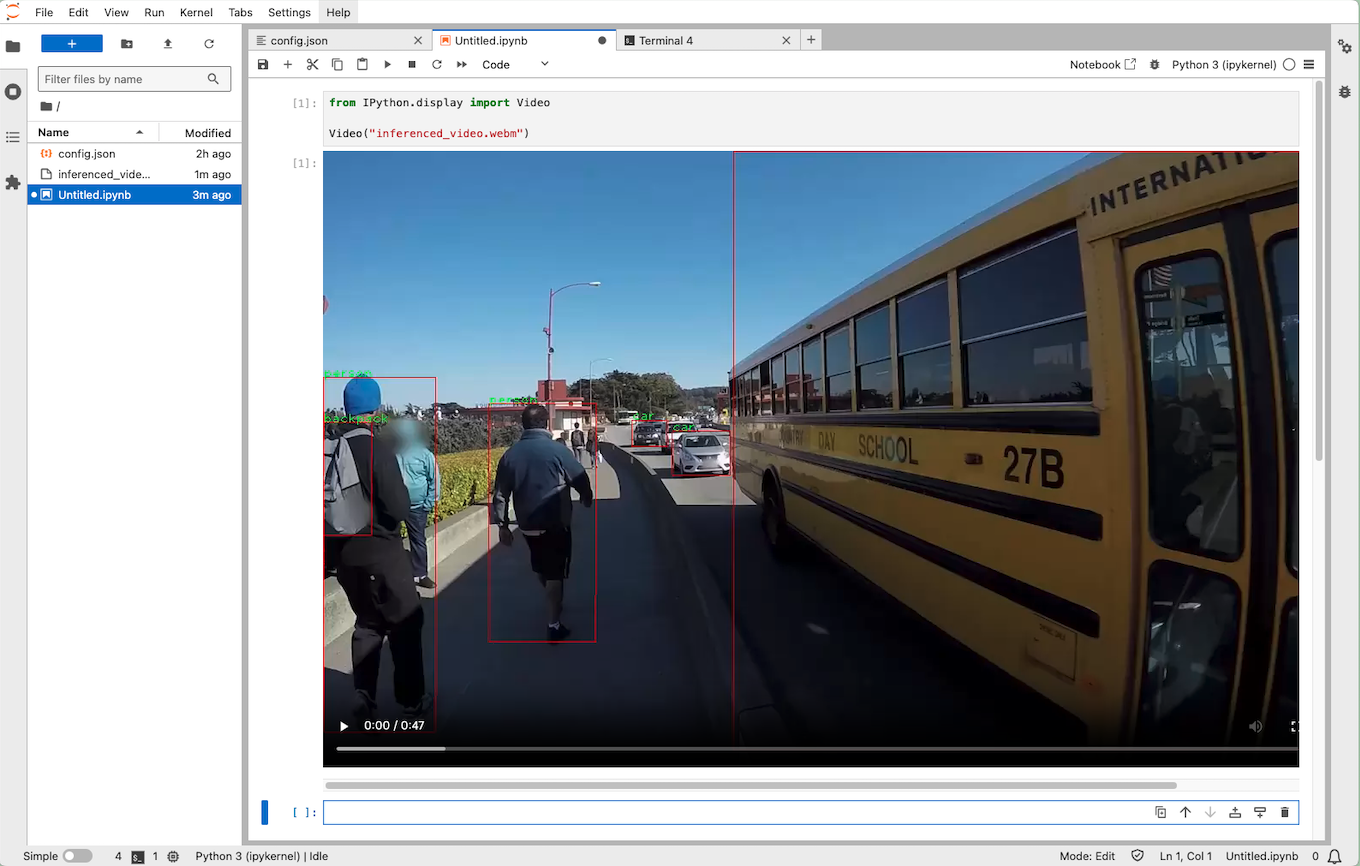
생성된 inferenced_video.webm 파일을 노트북에서 확인해볼 수 있습니다. 추론 ��결과가 영상에 표시되는 것을 확인해볼 수 있습니다.
